
Most Niagara Falls homeowners wait for the first hard frost before thinking about their siding, and by then good home detailing is harder to schedule and harder to do well. Pollen, road grime, and summer humidity build a film on vinyl, painted wood, and fiber cement that holds moisture against the wall all winter. Hand washing siding before the cold arrives is one of the cheapest ways to protect the finish you already paid for. This guide covers when to wash, how to do it without damaging the surface, and what to check while you are up on the ladder.
Table of Contents
- Quick Takeaways
- Why Siding Needs Washing Before Winter
- Choosing the Right Day and Temperature
- Comparing Washing Methods for Siding
- Hand Washing Technique, Step by Step
- Spotting Damage Before You Wash
- Entrances, Doors, and Trim
- Pre-Winter Detailing for Rentals and Listings
- Frequently Asked Questions
- References
Quick Takeaways
| Key Insight | Explanation |
|---|---|
| Book siding washes for a stretch of dry days | Choose a window where daytime temperatures are comfortably above freezing and overnight lows will not stay below zero long enough to freeze water in the joints before the wall dries. |
| Use a soft brush and mild detergent | Degreasers and bleach-heavy mixes can dull vinyl and stress painted surfaces, so stick to products made for exterior siding. |
| Keep pressure out of the siding | Driveway settings that clean concrete can split vinyl, push water behind laps, and lift paint. Use a wide fan tip and a gentle rinse at most. |
| Wash gutters before walls | Downspout runoff and gutter debris will streak clean siding, so clear gutters first and wash the wall from the top down. |
| Inspect while the surface is wet and clean | Cracked caulk, loose trim, and soft spots are much easier to see once the grime is gone, and they are cheaper to fix before the first freeze. |
| Include entrances in the same visit | Doors, thresholds, weatherstripping, and porch steps collect the same grime, and treating them together keeps the front of the house looking finished. |
Why Siding Needs Washing Before Winter
Siding takes a beating from May to October. Pollen, tree sap, road spray, and fine dust from gravel driveways all settle on the exterior wall, and warm, humid weather bonds that layer to the finish. On vinyl it shows up as a chalky grey haze near the ground. On painted wood and fiber cement it looks like faint streaks under the eaves.
The reason to deal with it in October rather than April is what winter does to that film. Wet grime against a wall, combined with temperatures that swing above and below freezing, holds moisture against the surface far longer than it should. Dirt also gives mildew something to feed on, and shaded walls that dry slowly are the first to show it.
What Builds Up Over a Summer
Not all grime is the same. Dark streaks along the bottom course usually come from splash-back, because every rain carries soil and mulch up onto the lowest panels. Greenish or black spotting on the shaded side is typically algae or mildew, and it grows fastest where the siding never gets direct sun. Pollen is mostly a surface nuisance, but mixed with humidity it becomes sticky and harder to lift each season.
In practice, I look at the bottom two feet of the wall first. That is where the worst buildup usually sits, and it is the first place neglect shows up as staining or dull patches.
Why Trapped Moisture Is the Real Problem
Clean siding sheds water. Siding coated in a sticky film holds it, and that film gets worse once the first freeze arrives. Water that sits in the grooves of a lap joint or behind a loose trim board can freeze, expand, and push the edge further from the wall. A late-fall wash removes the film so rain and melt run off the way the siding was designed to let them.
A common mistake is assuming the siding is fine because it looks fine from the driveway. Walk closer, look at the lower third, and check the shadow side. That is where most of the neglect hides.
Choosing the Right Day and Temperature
The window for siding washing in the Niagara Falls area is narrower than most people expect. You need daytime air temperatures comfortably above freezing, a dry afternoon, and an overnight low that stays above zero long enough for the wall to dry. A wall that gets washed and then freezes before it dries is worse off than one left alone, because the water becomes ice in the joints.
Reading the Forecast Correctly
Check the overnight low, not just the daytime high. A sunny 12 degree Celsius afternoon followed by a night at minus three will leave wet shadows under the eaves that refreeze by morning. Plan for at least one dry day after the wash, and avoid booking the job the day before a cold snap. Waiting a week is better than rushing a wash into a freeze.
Pro tip: Check the forecast the morning of the job, not the night before. Overnight changes are common in this part of Ontario, so be ready to reschedule if the lows drop.
Why Freezing Water Ruins a Wash
Water left in lap joints, under soffit edges, and behind trim boards is the real problem. When it freezes it expands, and on vinyl that can crack a panel, split a nail hole, or bow the edge outward. On painted wood, trapped water lifts paint that summer sun has already weakened. Good timing removes this risk entirely.
On shaded walls we allow extra drying time before dusk and avoid washing them late in the day. A wall that is still damp at sundown is the one most likely to freeze overnight.
Timing Your Visit Around the Rest of the Work
Siding should be washed after the gutters are cleaned, not before. Gutter debris and downspout runoff splash dirty water onto the wall below, so a wash done first gets streaked again. The order that works best is gutters, then roof edge and soffits, then siding from top to bottom, then windows, doors, and entrances. Power washing hard surfaces like the driveway should come last, because dirt blown back onto clean walls is hard to remove.
Comparing Washing Methods for Siding
Three methods get used on exterior walls, and they are not interchangeable. Hand washing with a soft brush and mild detergent is the one I trust for most homes. High pressure has a place on concrete, but it has no place on most siding. The table below shows where each method earns its keep.
| Method | Best Use on Siding | Main Risk |
|---|---|---|
| Hand washing with a soft brush and mild detergent | Vinyl, painted wood, fiber cement, and delicate trim | Slower work that needs careful ladder footing and patience on tall walls |
| Low-pressure rinse with a wide fan tip | Final rinse after detergent, or light dust on sturdy siding | Will not lift bonded mildew or dried sap on its own, and too close a nozzle can drive water under laps |
| High-pressure washing with a concentrated jet | Concrete, driveways, and stripped hard surfaces, not siding | Can split vinyl, force water behind panels, and strip paint that is already chalking |
Hand Washing With a Soft Brush
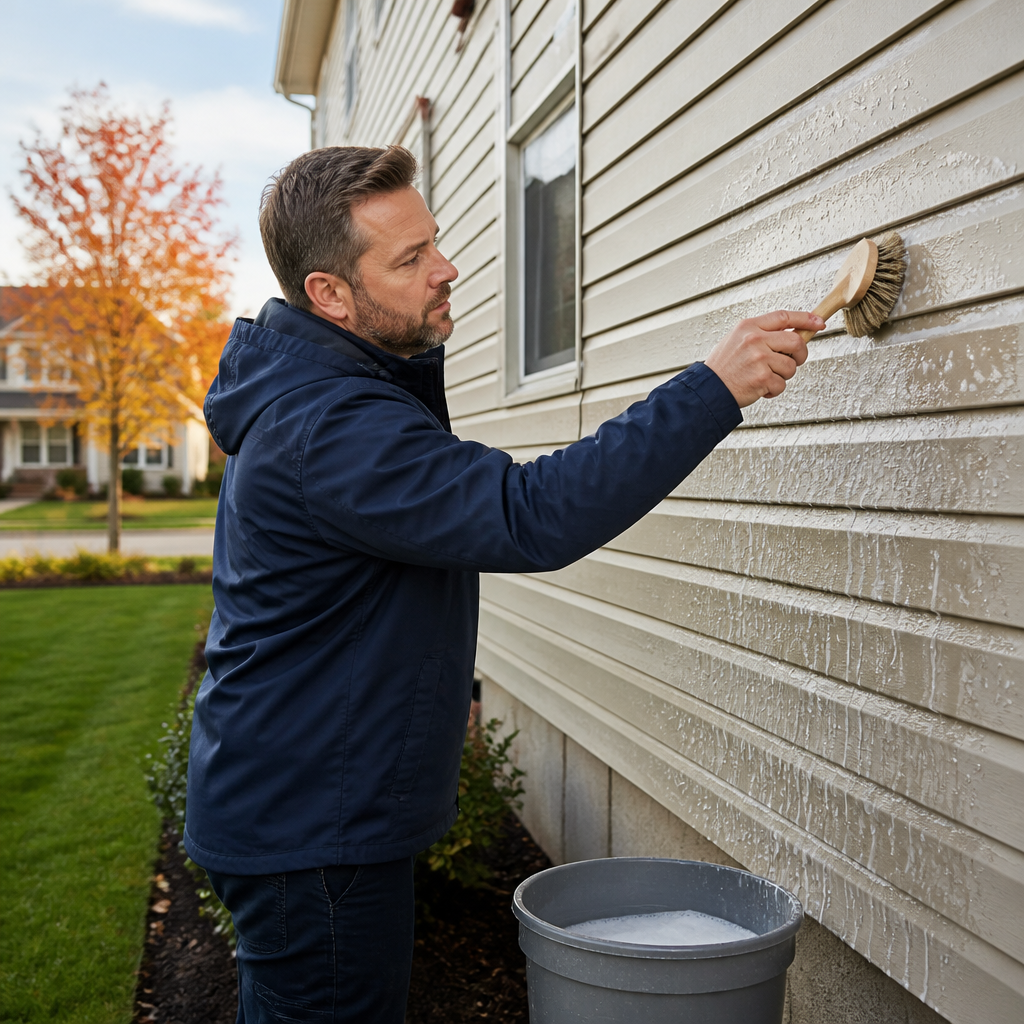
Hand washing lifts grime off the surface instead of blasting it into the seams. A soft brush on a telescoping pole, paired with a bucket of mild detergent, reaches the second storey from the ground for most of the wall. The detergent loosens oily film and pollen, and the brush does the rest. Work in small sections so the soap never dries on the siding.
Why High Pressure Is the Wrong Tool for Most Siding
High-pressure washing is designed for concrete and stripped surfaces. On vinyl, a concentrated jet can split the top of a panel, push water up under the lap, or leave a dull, patchy finish. On painted wood it can lift paint that has started to chalk. Even with a wide fan tip, the nozzle should stay well back and never be aimed up under the siding.
A common mistake is grabbing the driveway pressure washer because it is already set up. The settings that clean concrete are the settings that damage siding.
Where a Low-Pressure Rinse Still Fits
A low-pressure rinse is the finishing step, not the cleaning step. Once the detergent has done its work, a gentle rinse from top to bottom removes the film and leaves the surface ready for inspection. It works well on sturdy fiber cement and clean vinyl, but baked-on mildew and dried sap need a targeted treatment and more brushing.
Hand Washing Technique, Step by Step
The method matters more than the equipment. You need a bucket of lukewarm water with a small amount of mild detergent made for exterior surfaces, a soft-bristled brush on a telescoping handle, a hose with a gentle spray setting, and a stable ladder for the upper storeys. Keep a second bucket of clean water for rinsing the brush so you are not returning grit to the wall.
Mixing the Solution and Testing First
Avoid degreasers, bleach-heavy mixes, and anything labelled for concrete. Bleach can dull vinyl and stress painted finishes over time, and degreasers often leave a residue that attracts more dirt. Dilute the detergent according to the product label, then test a small hidden spot, such as the back of a corner trim piece, and check it once it dries.
Working Top to Bottom Without Streaks
Start at the top of each wall section and work down. Gravity pulls the dirty solution toward the ground, so starting low means re-cleaning the same spot. Wet the section, scrub in small overlapping strokes, and rinse before the soap dries. On a warm day you have only a few minutes before drying lines appear.
Pro tip: Wash a small section, rinse it, and move on. Soap left to dry on a sunny wall leaves streaks that look worse than the dirt you started with.
Rinsing Trim, Corners, and Soffits
Corners, window trim, and the underside of soffits hold the most grime because water sits there longest. Use the brush more firmly on these areas, but stay gentle on paint. Rinse them last so the water running down the wall carries loosened dirt off the surface instead of spreading it back across the panels.
Key insight: most siding damage after a wash comes from the method, not from the dirt that was already there.
Spotting Damage Before You Wash
A wash is the best time to inspect siding, because the surface is clean and wet, and cracks and gaps stand out against the light finish. Walk the full perimeter and note anything that needs repair before winter. A small caulk gap is a cheap fix in October and an expensive one in February.
Caulk and Seal Failures
Look at the caulk around windows, doors, outdoor fixtures, and where siding meets trim. Caulk that has pulled away, cracked, or turned chalky no longer keeps water out. Pressing a fingertip along the seam will show you soft or crumbling sections. Mark them and reseal once the temperature is above the product’s minimum application range.
Loose Trim, Soft Spots, and Rot
Tap along fascia boards, corner trim, and window casings. A dull thud where the wood should feel solid usually means moisture has been sitting there for a while. Press any suspect spot with a screwdriver. If the tip sinks in, the wood needs repair before the freeze-thaw cycle works on it. Loose trim should be re-fastened while the weather still allows it.
Vinyl Cracks and Fading
Vinyl cracks often start at a nail hole or at a fastener driven too tight, which prevents the panel from expanding and contracting. Look for hairline splits near the bottom edge of panels and for a bowed or wavy profile. Fading shows up as a difference in tone between sun-exposed and shaded walls. A wash will not fix either problem, but it will show you exactly where they are.
Entrances, Doors, and Trim
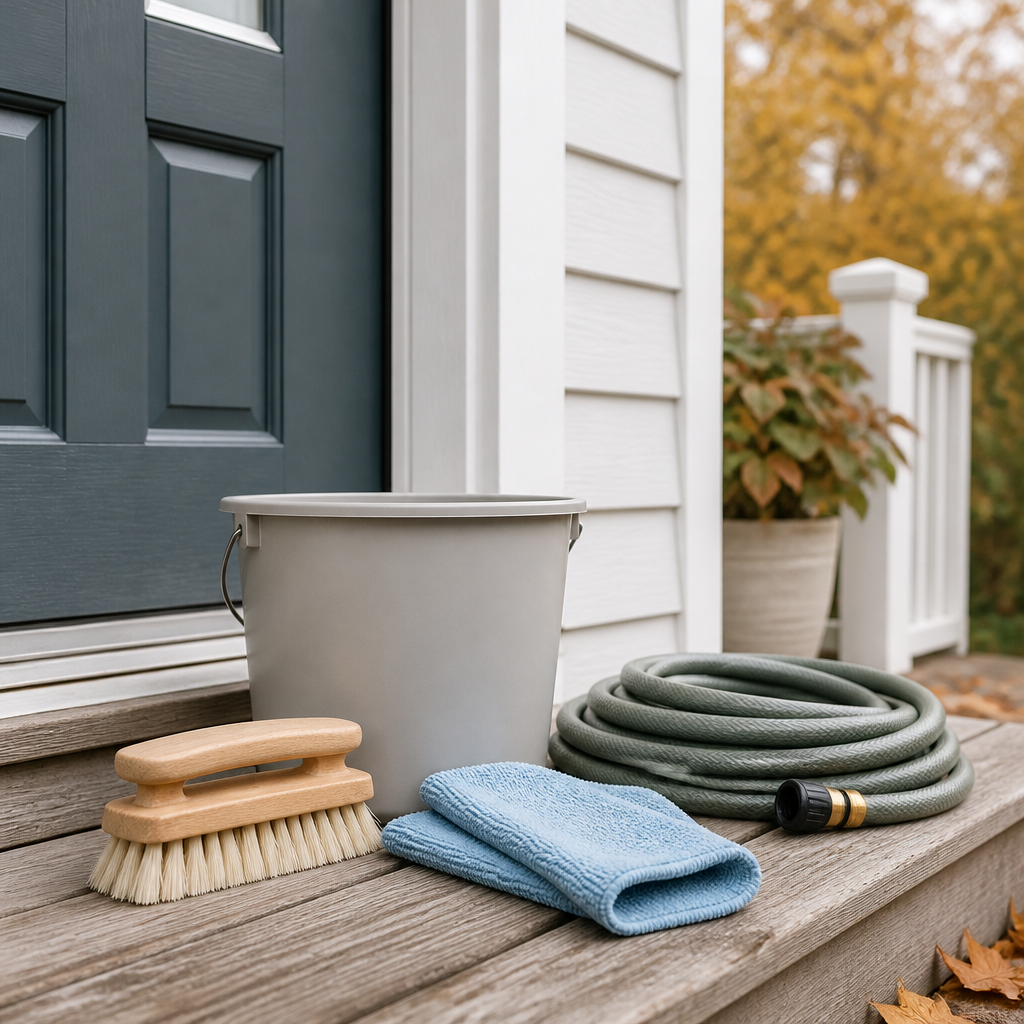
Siding is only half of what a visitor sees from the street. The entrance is where guests, deliveries, and muddy boots converge, and it collects grime that a siding wash does not fully reach. Including the front door, the frame, the porch, and the threshold in the same visit keeps the whole approach looking finished.
Front Doors and Painted Surfaces
Wood and steel doors are usually painted or stained, and their finish takes the same beating as the siding. Use the same mild detergent, and keep the pressure at rinse level or lower. Clean glass panels separately, and check the weatherstripping while you are there. Cracked or flattened weatherstripping lets cold air and drafts in all winter.
Window Sills, Tracks, and Screens
Sills and tracks collect dead insects, grit, and pollen. Left in place, that grit works into weep holes and tracks, and water that should drain out pools instead. Clear tracks with a brush and vacuum, then rinse the sill. Screens should come down and be washed separately before the first frost. Spider webs and egg sacs near entrances are often cleared on the same visit, which makes it harder for pests to settle in for winter.
Porch Steps and Walkways Near the Entrance
Porch steps and walkways are the one area where a low-to-moderate pressure wash makes sense, because concrete and stone can handle more force than siding. Use a fan tip, keep the spray away from the door and the siding behind it, and let surfaces dry before the next hard freeze. Algae on shaded steps becomes a slip hazard once it freezes, so treat it before winter arrives. For a broader look at what to check, a fall maintenance checklist can help you cover the rest of the property.
Pre-Winter Detailing for Rentals and Listings
Property managers and real estate agents look at exteriors from a different angle. A rental that looks tired in October draws fewer inquiries for winter leases, and a listing with grimy siding photographs poorly even when the interior is spotless. Booking siding and entrance detailing before the first freeze protects both appearance and paint across every unit in a portfolio.
What to Specify When You Book
Ask for a written scope that names the surfaces, the methods, and the areas to skip. A vague request like “clean the outside” can lead to a pressure wash on vinyl or a missed entrance. Confirm whether trim, soffits, doors, and gutters are included, and whether the work is scheduled in a single visit per property.
Documenting Condition Before and After
Photograph each elevation before the wash, then take matching photos from the same spot afterward. These images are useful for landlords, for inspection reports, and for listing photos. They also make it easy to flag cracked caulk or a loose board for repair before the weather turns.
Pro tip: Book siding and gutter work in the same week for multi-unit properties. Gutter debris washed onto freshly cleaned siding is one of the most common reasons a wash looks streaked the next morning.
Frequently Asked Questions
How often should siding be hand washed in the Niagara Falls area?
Once a year in autumn is a sound baseline for most homes. Houses under heavy tree cover, or those near busy roads and gravel driveways, often benefit from a spring wash as well. The fall wash matters most because it removes the film that winter would otherwise hold against the wall.
Can I wash my own vinyl siding instead of hiring someone?
Yes, if you use a soft brush, a mild detergent, and a gentle rinse, and you keep the pressure low. Most damage happens when homeowners use a driveway pressure washer or a degreaser. Work from a stable ladder, and never lean a ladder against a panel that feels loose.
Is it too late to wash siding in late November?
It depends on the forecast. If daytime highs are comfortably above freezing and no hard freeze is expected for at least a day after the wash, you can still do it. If overnight lows will sit below zero for several days, wait until spring rather than risk trapped water freezing in the joints.
Does hand washing remove mold and mildew from siding?
Light mildew usually comes off with detergent and a soft brush. Heavy black staining often needs a dedicated treatment, and bleach-based products should be used carefully and tested on a hidden spot first. If the staining returns quickly, the shaded side of the house may need more frequent attention.
Why not just use a pressure washer on siding to save time?
A pressure washer saves time on concrete, but it can split vinyl, drive water behind panels, and strip paint that is already chalking. The time saved is usually lost to repairs. A hand wash with a soft brush takes longer, but it protects the finish you are trying to keep.
Can spider web removal be added to a siding visit?
Yes. Spider webs, egg sacs, and nests around doors, windows, and eaves are often cleared during the same visit, since they are easy to address while the house is already being cleaned. Treating these areas before winter makes it less likely that pests will settle into sheltered corners.
We would love to hear how your siding held up last winter, so tell us which part of your home was the hardest to clean.
We would love your feedback and any insights you would share with others. What perspective would you add?