Most homeowners in the Greater Toronto Area wipe down their window glass and call it done. What they overlook are the window tracks and sills – the narrow grooves and ledges that quietly collect months of pollen, road grit, dead insects, spider webs, and moisture. Left unattended, that buildup does not just look bad. It jams your windows, traps mold, and accelerates frame deterioration. At Performance Window Cleaning, we have been opening up clogged window tracks since 2008, and we see the same avoidable damage every season. This guide gives you the exact process we use, adapted for DIY homeowners who want professional-grade results.
Table of Contents
- Quick Takeaways
- Why Window Tracks Get So Dirty in the GTA
- Tools and Supplies You Need
- Step-by-Step Window Tracks Cleaning Process
- How to Clean Window Sills by Material Type
- Dealing with Mold and Mildew in Tracks and Sills
- DIY vs. Professional Window Track Cleaning: Comparison
- How Often Should You Clean Window Tracks and Sills?
- Frequently Asked Questions
- References
Quick Takeaways
| Key Insight | Explanation |
|---|---|
| Vacuum before you wet-clean | Dry debris must come out first. Skipping this step turns loose dirt into muddy paste that is harder to remove than the original grime. |
| Baking soda and vinegar dissolve stuck-on gunk | Sprinkle baking soda into tracks, mist with white vinegar, and let it fizz for 10 minutes before scrubbing. This combination tackles grease, mold stains, and caked debris without scratching vinyl or aluminum. |
| Lubricate tracks after every deep clean | Vinyl tracks need a light silicone lubricant. Wood tracks need an appropriate wax. Skipping lubrication means windows will bind and drag within weeks of cleaning. |
| GTA winters make spring cleaning non-negotiable | Road salt, mineral deposits, and winter condensation accumulate through the closed season. Spring is the highest-impact time to clean tracks and sills in the Greater Toronto Area. |
| Mold on sills is not just cosmetic | Black or dark spots on window sills are often mold spores. Straight white vinegar (5 to 6 percent acetic acid) kills the majority of mold on contact when left to dwell for at least 60 minutes. |
| Material matters for sill cleaning | Wooden sills absorb moisture and require rinsing and drying immediately. Vinyl and aluminum sills tolerate more water but still need thorough drying to prevent mineral staining. |
| Dirty tracks signal deeper problems | Debris buildup around frames can hide failing seals, cracked caulking, and early water intrusion – issues that become expensive if caught late. |
Why Window Tracks Get So Dirty in the GTA
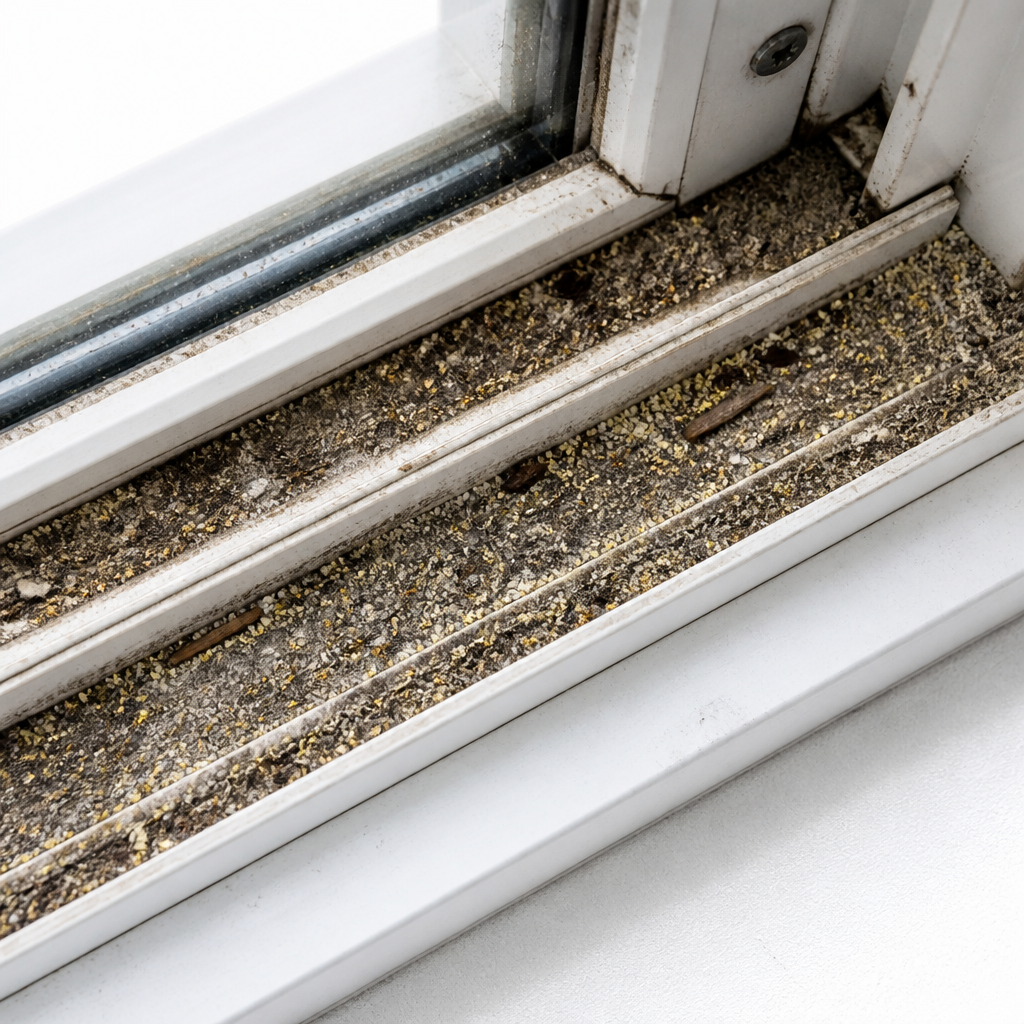
The Greater Toronto Area throws a lot at residential windows. Spring brings heavy pollen from the Don Valley greenery. Summer adds airborne grit and humidity. Fall drops decomposing leaf matter. Winter seals windows shut for months while road salt and condensation work on the frames from inside and out. By the time homeowners open their windows again in April or May, the tracks are often compacted with a season’s worth of material.
Urban pollution plays a significant role specific to the GTA. Fine particles from traffic settle quickly in horizontal channels like window tracks and sills, and they are nearly invisible until buildup becomes substantial. Dirty window tracks also spill debris directly onto the sill below, which is why the two surfaces need to be cleaned as a unit, not independently.
There is also the pest factor. Spider webs, dead insects, and fly debris concentrate in window corners and track grooves. At Performance Window Cleaning, our teams in Mississauga, Brampton, Vaughan, Markham, and throughout the GTA consistently find the worst track buildup in homes that have not been professionally serviced in over a year. This is not a criticism of homeowners – tracks are simply designed in a way that makes self-cleaning awkward and easy to defer.
Tools and Supplies You Need
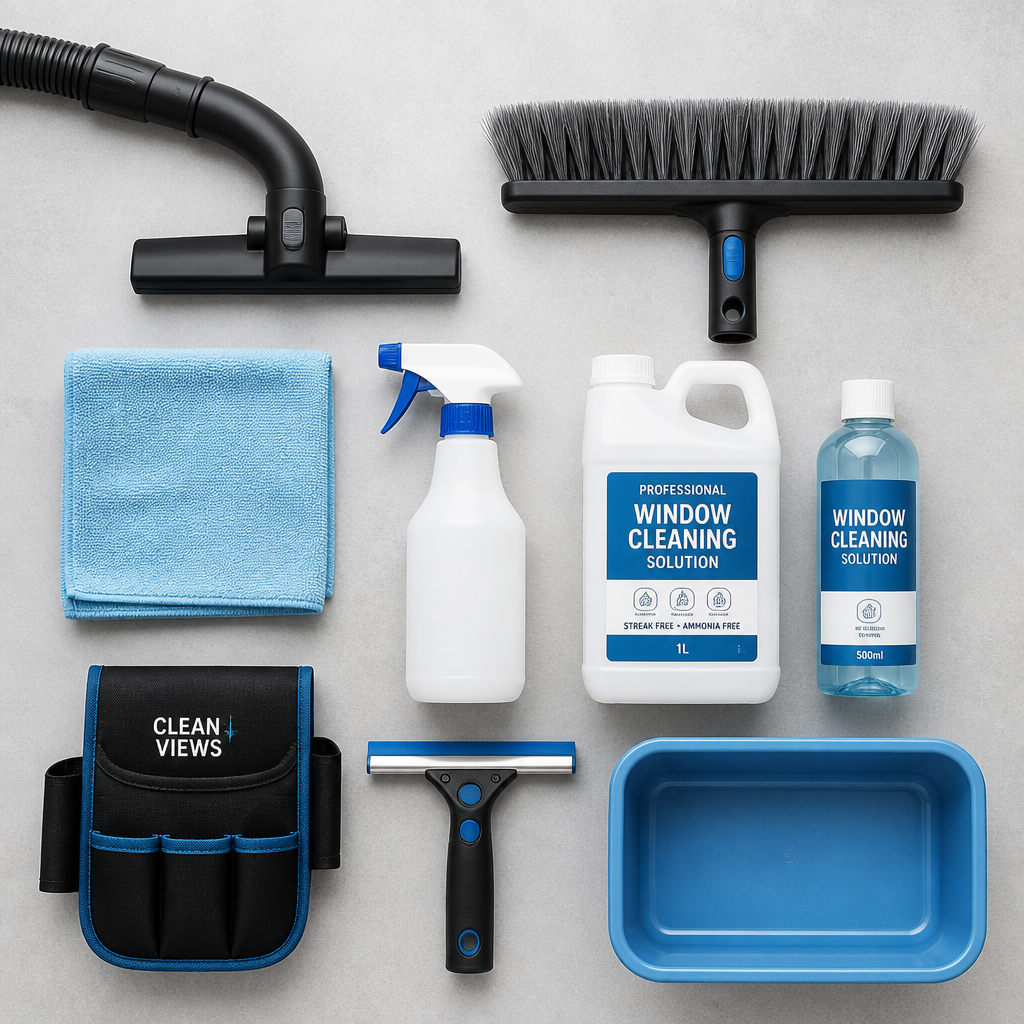
One of the most common mistakes people make is grabbing a cloth and a spray bottle and expecting it to be enough. Window tracks have tight corners and narrow channels that a cloth cannot physically reach. Having the right tools before you start cuts the job time significantly and produces a cleaner result.
The Short List
- Vacuum cleaner with a narrow crevice or wand attachment
- Old toothbrush or stiff nylon scrub brush
- Cotton swabs or wrapped chopsticks for tight corners
- Microfiber cloths (at least two – one damp, one dry)
- Spray bottle
- Baking soda
- White distilled vinegar
- Dish soap diluted in lukewarm water (for sills)
- Silicone lubricant (for vinyl tracks) or wax (for wood tracks)
A diluted vinegar solution made from 3 parts warm water to 1 part distilled white vinegar is effective on vinyl, painted wood, and aluminum frames without causing surface damage. You do not need commercial cleaners for standard track grime. Where mold is present, straight undiluted white vinegar is more effective for the initial treatment.
Pro tip: Wrap a microfiber cloth around a butter knife or thin spatula to reach the very bottom corners of deep tracks. This improvised tool gets into spaces where even a toothbrush cannot make solid contact.
Step-by-Step Window Tracks Cleaning Process
This is the process our teams follow. It works on virtually every sliding, double-hung, and casement window type found in GTA residential homes.
Step 1 – Dry Vacuuming First
Open the window fully and, where possible, remove the screen to clean separately later. Use your vacuum’s narrow wand attachment to pull out loose debris, dust, dead insects, and dry dirt from the entire track length. This step is non-negotiable. Skipping it means you will push loose grit into a wet paste that sticks harder than the original buildup.
Step 2 – Apply Baking Soda and Vinegar
Sprinkle a light, even dusting of baking soda along the full track. Use a spray bottle set to mist and apply white vinegar over the baking soda. It will fizz. That reaction is actively loosening compacted grime. Let it sit for at least 10 minutes. Do not use too much baking soda – a heavy application creates a violent fizz that splashes out of the track and onto your wall or floor.
Step 3 – Scrub the Track
Work an old toothbrush or stiff nylon brush along the track in short back-and-forth strokes. Pay extra attention to the corners and the bottom of the channel where debris compacts hardest. For very narrow sections, use a cotton swab to push into the tightest spots. Switch to fresh swabs as they become saturated with grime – using a dirty swab just redistributes debris.
Step 4 – Wipe and Rinse
Use a damp microfiber cloth to wipe out the dissolved grime. Work in the same direction from one end of the track to the other. Fold the cloth to a clean surface frequently. Follow with a dry cloth to absorb remaining moisture, particularly in wood tracks where standing water causes swelling and staining.
Step 5 – Lubricate
This is the step most people skip, and it is why their windows start dragging again within a few weeks. Apply a small amount of silicone lubricant to vinyl tracks, or an appropriate wax to wooden tracks. Open and close the window several times to spread the lubricant evenly. Add a second light application if the window still feels stiff.
Pro tip: Clean the window screen separately with a garden hose while it is out. Lay it flat, spray it down, let it air dry completely before reinstalling. A dirty screen redeposits grit into freshly cleaned tracks the first time rain hits it.
How to Clean Window Sills by Material Type
Window sills are not all the same surface. The cleaning approach that works well on vinyl can damage an unsealed wood sill, and ignoring the difference leads to warping, staining, and premature deterioration.
Vinyl Sills
Vinyl is the most forgiving surface. Fill a spray bottle with lukewarm water and a few drops of dishwashing detergent. Apply the solution to a microfiber cloth and wipe down the sill surface. Follow with a dry cloth to prevent oversaturation and water pooling. For stains, a baking soda paste applied directly and left for a few minutes before scrubbing works well without scratching the surface.
Painted Wood Sills
Wood sills absorb moisture, so speed matters. Use a soft bristle brush and soapy water to scrub the surface, then rinse and remove excess water quickly before it can soak into the grain. Do not let any liquid sit on a wood sill. If you find watermarks or light staining, fine-grade sandpaper used gently can often restore the appearance before you repaint. A diluted vinegar solution works well on painted wood without lifting the finish, provided it is wiped off promptly.
Aluminum Sills and Frames
Aluminum is durable but shows mineral staining from hard water more visibly than vinyl. The same diluted vinegar solution used for tracks works well here. Rinse with a damp cloth and dry thoroughly. A diluted bleach mix (roughly 1 cup bleach to 1 gallon of water) is safe for powder-coated aluminum when addressing stubborn stains, provided it is rinsed off completely and not left to sit.
Window sills collect a mix of airborne particles, moisture, and outdoor contaminants. In cities like Toronto, exterior pollution adds fine particulate matter that settles quickly in horizontal surfaces and is hard to notice until buildup becomes visible – which is why regular cleaning is necessary, not optional.
Dealing with Mold and Mildew in Tracks and Sills
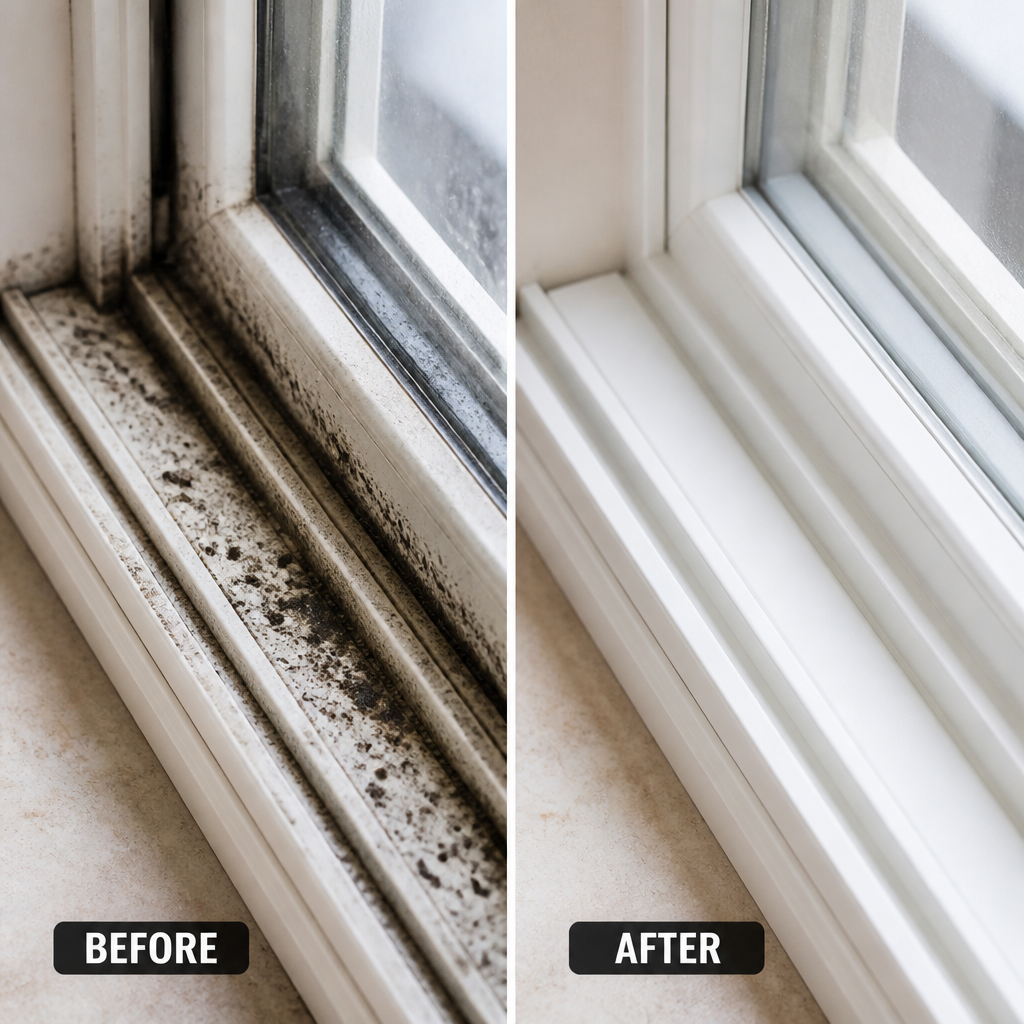
Dark or black spots on window sills are very often mold, not just discoloration. Wooden sills are especially vulnerable because they absorb the condensation that accumulates during GTA winters and the humidity that follows in spring. Mold on window surfaces is a health issue, not just an aesthetic one, and standard household cleaners rarely deal with it adequately.
The Vinegar Treatment
Straight white vinegar at 5 to 6 percent acetic acid concentration kills the majority of common household mold spores. Mist it generously over the affected area – the track, caulking, glazing bead, or sill surface – and let it dwell for at least 60 minutes. Vinegar needs contact time to penetrate mold roots; a quick spray and wipe will not eliminate the colony. After the dwell time, scrub with a nylon brush and wipe clean with a microfiber cloth.
When to Use Bleach
For entrenched black mold staining that persists after vinegar treatment, a diluted bleach solution is appropriate. Mix roughly 1 cup of bleach per gallon of water and apply it to the affected area. Wear rubber gloves and ensure ventilation is open. The bleach solution is safe for vinyl and aluminum surfaces, provided it is rinsed off thoroughly and not left to sit for more than 10 minutes. Avoid bleach on bare wood – it can lift grain and cause discoloration.
If mold keeps returning to the same spot after repeated treatment, the issue is usually a failed window seal or cracked caulking allowing moisture intrusion. That is a repair job, not a cleaning job. Performance Window Cleaning teams flag these issues during service visits so homeowners can address them before they escalate.
DIY vs. Professional Window Track Cleaning: Comparison
| Factor | DIY Cleaning | Professional Cleaning (Performance Window Cleaning) |
|---|---|---|
| Time investment | 30 to 90 minutes per session depending on window count and buildup severity | Handled as part of a full window service; no time cost to the homeowner |
| Tools required | Vacuum, toothbrush, cloths, baking soda, vinegar, lubricant – mostly items you already own | Professional-grade equipment including specialized track brushes, purified water systems, and commercial lubricants |
| Mold identification | Homeowner may miss early-stage mold or mistake it for staining | Trained technicians identify mold, failed seals, and caulking failures that indicate underlying moisture problems |
| Result quality on heavy buildup | Good for routine maintenance; difficult to fully clear compacted, long-neglected tracks without professional tools | Full removal of compacted debris, staining, and biological growth; includes lubrication and condition check |
| Frequency suitability | Best for homes cleaned every 3 to 4 months; manageable between professional visits | Recommended twice yearly (spring and fall) for GTA homes; more often for commercial properties |
| Cost | Essentially free using household supplies | Included in window cleaning packages; view Performance Window Cleaning service packages |
How Often Should You Clean Window Tracks and Sills?
The honest answer is more often than most homeowners currently do it. A basic wipe-down of sills should happen monthly as part of regular interior cleaning. A thorough track cleaning – including vacuuming, scrubbing, and lubrication – should happen at minimum twice per year for GTA homes.
Spring is the most impactful cleaning window. After a GTA winter, tracks accumulate mineral deposits from condensation, road salt residue blown in through gaps, and biological matter from months of being sealed shut. Cleaning tracks in April or early May removes all of that before the outdoor season begins and before insects and spiders start using the tracks as their preferred home base.
Fall is the second priority. Summer pollen, dust, and grime should be cleared before windows close for winter. Leaving that material sealed inside the tracks for five or six months accelerates corrosion on aluminum components and gives mold spores ideal conditions to establish themselves.
For homes near busy roads, construction zones, or heavily treed areas, quarterly cleaning is a realistic minimum. The same applies to commercial properties where exterior grime accumulates faster due to foot traffic, ventilation systems, and vehicle exhaust. Performance Window Cleaning offers gutter and exterior maintenance packages that can be bundled with window track service to address the whole building envelope at once.
If your windows are sticking, binding, or require excessive force to open and close, the tracks need immediate attention regardless of where you are in the calendar. Forcing a dirty, unlubricated window is how frames crack and hardware breaks.
Frequently Asked Questions
What is the fastest way to clean window tracks?
The fastest effective method is to vacuum first with a crevice attachment to pull out dry debris, then sprinkle baking soda along the track, mist with white vinegar, wait 10 minutes, scrub with an old toothbrush, and wipe clean with a microfiber cloth. Skipping the vacuuming step is the single biggest time-waster because you end up pushing loose debris into a paste that takes longer to remove than if you had vacuumed first.
Can I use bleach to clean window tracks?
Yes, but carefully. A diluted bleach solution (about 1 cup of bleach per gallon of water) is appropriate for vinyl and aluminum tracks when mold or heavy biological staining is present. Rinse thoroughly after application and do not leave it to sit for more than 10 minutes. Never use bleach on bare wood tracks – it can lift the grain and cause irreversible discoloration. For routine grime, baking soda and vinegar are safer and equally effective.
Why do my window tracks keep getting dirty so quickly after cleaning?
Two main causes. First, you may not be lubricating after cleaning – dry, unlubricated tracks create friction that grinds debris into the surface and makes buildup stick faster. Second, if you are not cleaning the window screen when it is out, the screen redeposits grit back into the track with the first rainfall. Lubricate every time you do a deep clean, and rinse screens separately before reinstalling them.
How do I remove black mold from window sills?
Mist the area with straight white distilled vinegar and let it dwell for at least 60 minutes before scrubbing with a nylon brush. Vinegar works on most common household mold species. For persistent black mold staining on vinyl or aluminum surfaces, follow up with a diluted bleach solution to remove residual discoloration. If mold keeps returning to the same location, the underlying cause is almost always a moisture intrusion issue – a failed seal, cracked caulking, or inadequate weatherstripping – that needs to be repaired, not just cleaned.
Should I clean window tracks myself or hire a professional?
For routine maintenance every few months, DIY is entirely manageable with household supplies. For heavily neglected tracks, mold-affected sills, compacted multi-season buildup, or homes where you want a condition report on seals and caulking at the same time, professional service delivers meaningfully better results. In the GTA, where seasonal pollution and road salt accelerate deterioration, a professional clean twice per year paired with monthly DIY wipe-downs is the most practical combination for most homeowners.
What lubricant should I use on window tracks after cleaning?
Match the lubricant to the material. Use a silicone-based lubricant on vinyl tracks – it does not attract dust and remains effective longer than petroleum-based alternatives. For wooden window tracks, use an appropriate paste wax or furniture wax. Open and close the window several times after applying to work the lubricant into the full track length. Apply a second light coat if the window still feels stiff after the first application.
How does GTA weather specifically affect window tracks?
Toronto and the surrounding GTA experience four distinct seasons that each contribute differently to track deterioration. Spring pollen and rain wash debris into open tracks. Summer humidity encourages mold growth in any moisture left in track grooves. Fall leaves and decomposing organic matter compact in corners. Winter condensation deposits minerals and creates conditions for mold during the months when windows are sealed shut. This seasonal cycle is why twice-yearly deep cleaning – spring and fall – is the right baseline for GTA homes, not the once-every-couple-of-years approach many homeowners default to.
Have you tried the baking soda and vinegar method on your window tracks, or do you have a different approach that works well for GTA conditions? Share your experience in the comments below.
References
- Step-by-step guide to cleaning window sills and tracks, including seasonal maintenance advice
- Professional household cleaning guidance on window sill and track scrubbing and lubrication
- Two proven DIY methods for cleaning window tracks using baking soda, vinegar, and steam
- Window sill cleaning guide with GTA-specific context on urban pollution and mold on Toronto-area homes
- Complete guide to identifying and removing mold from window tracks, sills, and frames